Since our last article, the Legacy meta has continued to evolve. In the last few months, there have been multiple sets that have printed legacy playable cards, and people have been experimenting like crazy. It seems that the meta is going more and more towards greedy Four-Color (4C) Delver and 4C control decks. On the flip side, people are also trying Grixis, BUG, and 4C decks using mostly Snow Basic Lands and Arcum’s Astrolabe for mana fixing. Red Prison has also been making a comeback to combat these Delver and 4C decks. The EPIC Storm writing team has also been experimenting with two-to-three copies of Mox Opal, and Defense Grid in our main deck over Duress. These slight changes of course depend on how the meta continues to evolve, but at the end of the day, The EPIC Storm feels very solid.

Special Guest
Tom Hepp (Negator77):
Tom is a Legacy and dog lover from just outside of Philadelphia. He has had a few notable finishes over the past year including winning an SCG Legacy Classic and making the top 8 of both MTGO Legacy Playoff events. After a few years of running his trusty BUG Depths list, rumor has it that he may be branching out and trying to learn something a little more EPIC.
Deck List
SITUATION #1 – Dredge
In our first scenario, we are in game one against Dredge on the draw. Dredge can be a very tough matchup for The EPIC Storm because Dredge is extremely explosive, while also being able to efficiently leverage Cabal Therapy to rip our hand to shreds. Before the printing of Echo of Eons, Burning Wish hands were almost unplayable because Empty the Warrens doesn’t pair well against a deck that can make an army of 2/2 Zombie Tokens very quickly and efficiently with Bridge from Below. Echo of Eons forces all of the cards in each player’s graveyard to be shuffled back into each player’s library and gives both players a fresh start with seven cards. While this line can definitely backfire, it gives us a whole new angle of attack, which is always exciting!
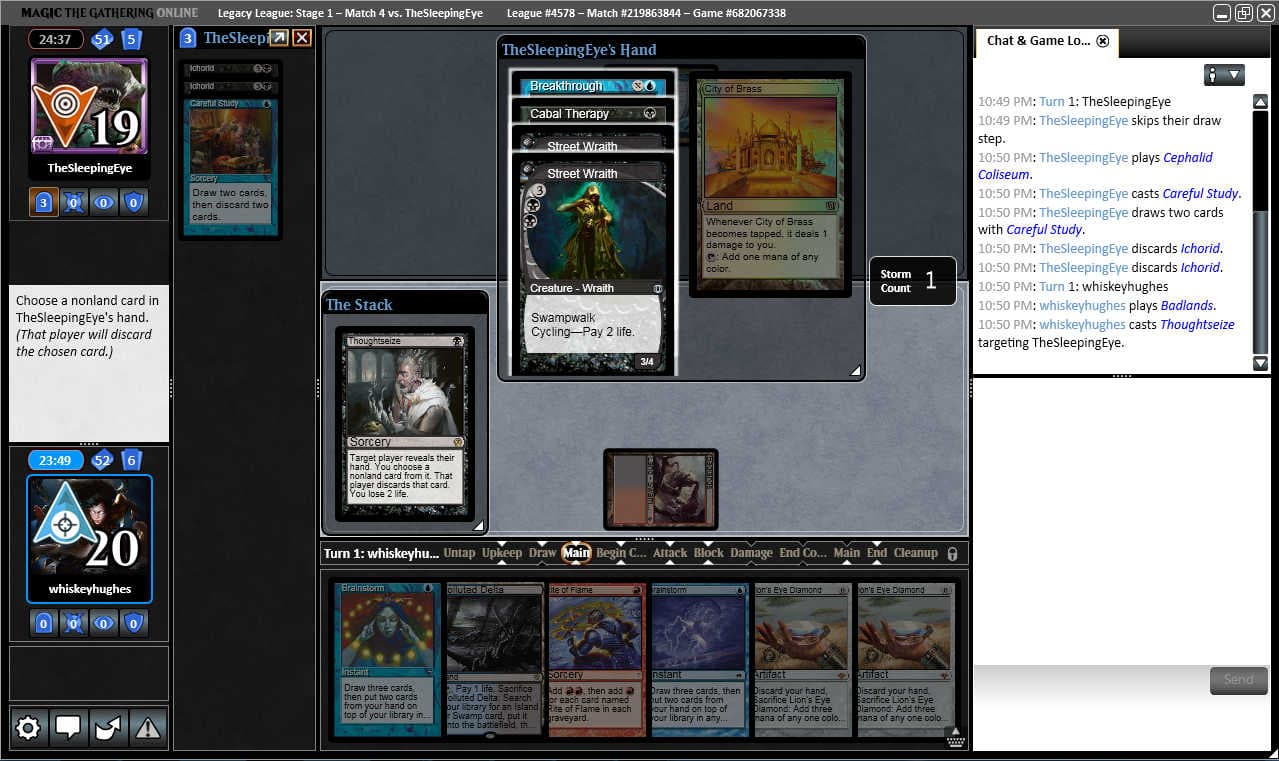
In this scenario, our opponent played a Cephalid Coliseum and then played Careful Study, discarding a pair of Ichorid. After breathing a huge sigh of relief at the fact that there were no creatures with Dredge in our opponent’s graveyard, I proceeded to cast Thoughtseize. Our opponent revealed a Breakthrough, a Cabal Therapy, two copies of Street Wraith, and a City of Brass. What would you take here, and why?
Special Guest
Tom Hepp
While there is a temptation to try and protect our hand and more specifically our Brainstorms from Cabal Therapy, the card to take with Thoughtseize here is Breakthrough in my opinion. There are just too many things that can go wrong if the opponent is allowed to untap with such an explosive card in hand. The opponent will likely cycle both Street Wraiths with the Ichorid triggers on the stack on their turn. If they hit any dredgers there or with their draw step, they can go berserk with Breakthrough. Even if they don’t, a Breakthrough for x=1 after already seeing three draws could enable crushing combination of cards such as Lion’s Eye Diamond, dredger, and Faithless Looting. If the the two draws off of the Street Wraiths or their draw step finds a Lion’s Eye Diamond, the opponent could Breakthrough off of City of Brass and then activate Cephalid Coliseum using the mana off the Diamond. In those scenarios, our hand could easily be picked apart anyway. Another Cabal Therapy off any of the draws will also end with us losing our Brainstorms. The best hope seems to be taking Breakthrough, playing out our Lion’s Eye Diamonds, having our opponent get some poor draws, and finding a path to win off the top immediately. Perhaps they also sequence poorly and target themselves with a Cabal Therapy to get a dredger into the yard and miss with the one that gets pointed at us if they name something like Infernal Tutor. If they use Cabal Therapy and flash it back to nab our Brainstorms, its possible that they could run out of ways to fuel their Ichorids and have no way to get a dredger into the yard. Getting threshold on Cephalid Coliseum could also be difficult from there since Cabal Therapy and both Street Wraiths would have been exiled.
#TEAMTES

Josh Hughes
To figure out the best card to take, I think we need to figure out what the opponent can do next turn, and try to slow him down. Ultimately, we are very close to being able to go off, so keeping our copies of Brainstorm are very important. It is very likely that the opponent will cycle both copies of Street Wraith in hopes of finding a Dredge creature. This will essentially give the opponent three draws. Chances are, if the opponent finds a Dredge creature, they will Cabal Therapy themselves to get the Dredge creature in the Graveyard. The risk, of course, is that if they don’t find a Dredge Creature, the opponent will most likely Cabal Therapy us and then Flash it back with an Ichorid to take our copies of Brainstorm. I think the best play is to still take the Breakthrough because if they are able to cast that with a Dredge creature, chances are they will find more Cabal Therapy and the game will spiral out of control. The opponent does have a Cephalid Coliseum in play, but to keep up Threshold, they will need to not put the Ichorids in play next turn. Then after taking Breakthrough, I would 100% play out the copies of Lion’s Eye Diamond.

Bryant Cook
Honestly, I think we sort of screwed up by not searching up Underground Sea to lead off the game with. This sets us up for a second turn Brainstorm into a fetchland before we even know our opponent’s hand. As for what to take here, I think we need to get lucky here and assume our opponent is going to draw blanks off of the Street Wraiths. Due to the pair of Ichorid coming back next turn and Cabal Therapy getting to discard both of our Brainstorms (assuming we take the correct line of playing out the two Lion’s Eye Diamond) on the flashback of Cabal Therapy, we’re going to be in some trouble if we discard Breakthrough. This means we need to discard the Cabal Therapy.

AJ Kerrigan
Taking Breakthrough will significantly slow our opponent down and potentially even force them to cast Cabal Therapy on themselves, whereas if we take Cabal Therapy we give them so many chances to have a really good next two turns where we get hit by Cabal Therapy a bunch of times anyway. Take Breakthrough and play both of our Lion’s Eye Diamonds. Our opponent will get to take our Brainstorms next turn using Cabal Therapy and Ichorid, but then we’ll be Cabal Therapy proof afterward and have a ton of outs to win the game.

Anthony LaVerde
I would take the Cabal Therapy and they play out our pair of Lion’s Eye Diamond. My reasoning for taking Cabal Therapy is that it will stifle our opponent’s chances to cast Cabal Therapy on us twice. This is important because typically a Dredge player’s first name with Cabal Therapy will most likely be Infernal Tutor and sometimes Burning Wish. Keep in mind that they have a pair of Ichorid in their graveyard, so if we let them keep Cabal Therapy, they will be able to use it twice on us and take our Brainstorms guaranteed. That being said, I think Cabal Therapy is the pick here.

Landon Sworts
I would take Cabal Therapy to limit the number of times they can cast it. On the following turn, it will likely be cast twice if we let it sit in the opponent’s hand.

Alex Poling
I would take Breakthrough here. That is one of their most explosive cards in the deck, and will really accelerate them into finding a card with Dredge. Right now they have a slow hand and no real way of getting a dredger into the graveyard. If they draw one they also have to draw a way to put it in the graveyard or use the Cabal Therapy on themselves. Either option is fine but slower than with a Breakthrough. After that, I would play out both copies of Lion’s Eye Diamond. Just in case the opponent decides to Cabal Therapy us. They’ll probably name some type of tutor and miss, but with Ichorid in play, they could flash it back to hit Brainstorm. I think we would be favored at that point just needed to draw a tutor or cantrip into one to win the game.

Daniel Lee
It feels like the decision here is between Breakthrough (playing to not lose) and Cabal Therapy (playing to win). Our hand is almost certainly going to be torn apart if we take Breakthrough, as our opponent will be able to cast and flashback Cabal Therapy next turn. This means we should take Cabal Therapy, as our opponent is pretty unlikely to kill us next turn, and may even need to use the Cabal Therapy in their graveyard on themselves to discard a card with Dredge. So our hand will be relatively safe if we take Cabal Therapy, giving us the highest chance to win next turn. I would take Cabal Therapy.

Alex McKinley
I think there are two reasonable choices here: Breakthrough and Cabal Therapy. Breakthrough is a combo piece for the opponent and lets them hugely advance their game plan. If they had a dredger, or the ability to put a dredger into the graveyard, I would be much more inclined to take it. Cabal Therapy on the other hand, would be incredibly devastating to our hand. Given the double Brainstorm and Lion’s Eye Diamond, it seems likely that the opponent would hit on the blind Cabal Therapy and then would have the ability to flash it back by sacrificing Ichorid. I would take the Cabal Therapy and then play out both Lion’s Eye Diamond, hoping that the opponent misses on the blind Cabal Therapy.
SITUATION #2 – Red Prison
Our second scenario is against Red Prison! With the insanely high impact that Wrenn and Six has had on Legacy, more decks are playing a very greedy mana base because of the mana consistency that Wrenn and Six brings. When we see the meta shift in this direction, there is usually a rise in Red Prison decks to combat these strategies. On the surface, any deck that plays Chalice of the Void and Trinisphere seems like a bad matchup for The EPIC Storm. Fortunately for us, we have a lot of game against Red Prison. Thanks to cards like Burning Wish, we can grab sideboard cards like Pulverize in game one. This makes Blood Moon much worse against us, as sometimes turning one of our lands into a Mountain is exactly what we need to deal with our opponent’s artifact hate.
HOW I SIDEBOARDED:
-2 Defense Grid, -2 Ponder, +4 Echoing Truth
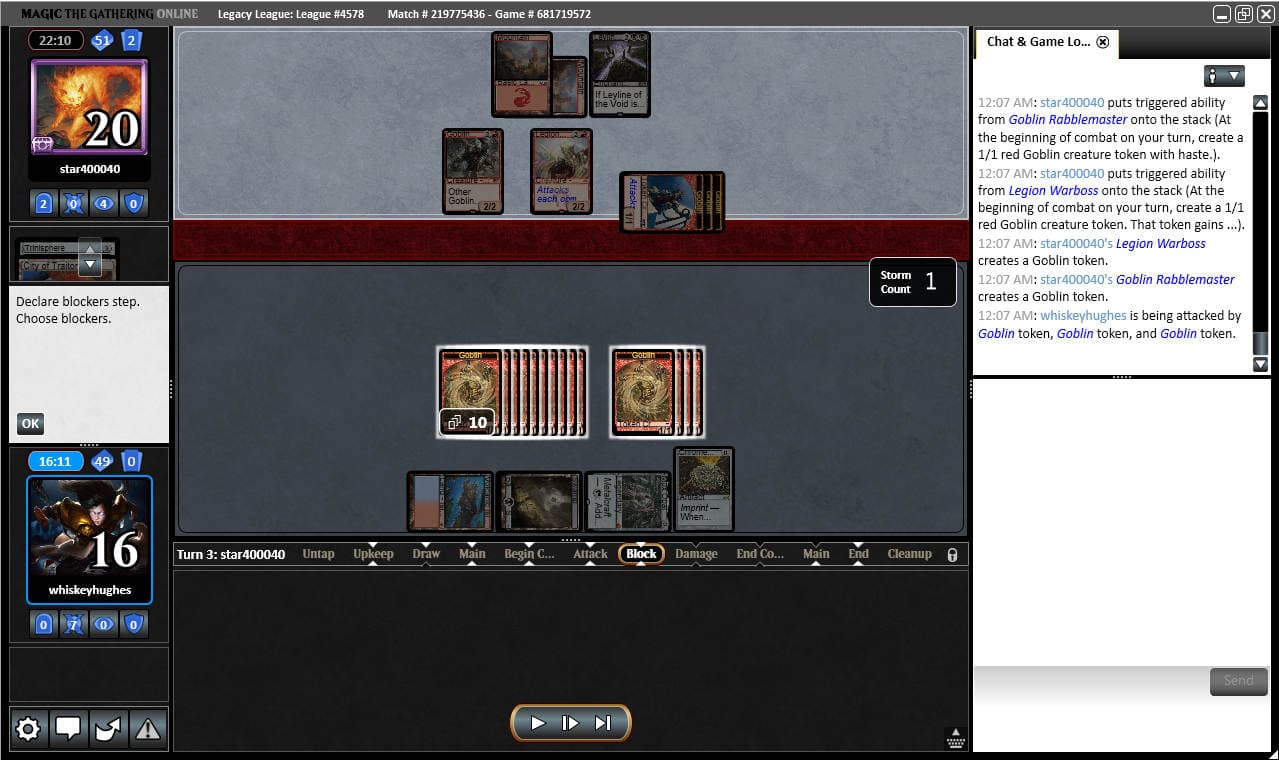
In this scenario, we are in game two on the Draw. We were fortunate enough to make our opponent discard their Trinisphere, and then make fourteen Goblin Tokens on turn two. Our opponent played a Goblin Rabblemaster, and then followed up with a Legion Warboss on turn three. When playing Storm strategies, sometimes combat math is a skill that isn’t developed or focused on. This can cause players to overthink combat scenarios and throw-away games that could have been won. Our opponent is currently attacking with three 1/1 Goblin Tokens. How would you block this turn, and then what would your attacks look like on the following turn?
Special Guest
Tom Hepp
After considering the various ways to block and try to win over three turns, my instinct is to just get them dead quickly. The opponents hand is a Scab-Clan Berserker and one unknown. We can’t ignore the opponents Goblin Tokens and attack with everything since the opponent would have lethal on board the following turn. What we can do is take the three damage and then swing with 13 of our 14 Goblin Tokens on our turn. After they make the easy blocks, that leaves them at 9 life and us with a blocker for Goblin Rabblemaster should it attack. No matter how they attack on their next turn, our leftover Goblin Tokens will be lethal on our following turn. The only way to lose from this position is if their one unknown card and draw step is exactly a land that produces two mana and either a Chandra, Torch of Defiance or Fiery Confluence. Fiery Confluence plus a two mana land basically kills us no matter what we do, so the only extra exposure we are taking on is Chandra, Torch of Defiance. I feel like this is worth taking on in exchange for cutting them off of an entire draw step where they could find Fiery Confluence. It also cuts off a sequence of cards like two single mana sources plus Fiery Confluence.
#TEAMTES
Josh Hughes
This scenario might seem overwhelming because the opponent is able to generate 2 tokens each turn, which in most scenarios can get out of control very quickly. Since all Goblin Tokens except Goblin Rabblemaster are forced to attack each turn, we just need to leave back two Goblin Tokens to make sure that we can block Goblin Rabblemaster. Leaving back a single Goblin Token is risky because they could kill one with Abrade or Chandra, Torch of Defiance. As long as we can prevent Goblin Rabblemaster from dealing damage, we can easily race our opponent.
Bryant Cook
I would take three here since we’re at a healthy life-total, next turn leave back two Goblin Tokens to play around a potential Chandra, Torch of Defiance and attack with the rest. Due to the clause on Goblin Rabblemaster, all other Goblin Tokens must attack and we don’t block anything other than Goblin Rabblemaster. This allows us to completely swing-out on the following turn for a victory.
AJ Kerrigan
From a high level, a shortcut I would take here is figuring out how we can block as much as possible over two turns while making sure we kill our opponent in two turns through them playing another creature next turn. We have the good fortune that most of their creatures are required to attack every turn, so the permutations are cut down significantly. Assuming our opponent would have two blockers each turn, we need to have at least 11 Goblin Tokens alive after this turn, so we have 3 malleable Goblin Tokens. If we do not block anything, we take three this turn and then 16, so we definitely need to do some blocking. Preferably, we’d block at least the Goblin Rabblemaster since that represents the most damage, but even just taking some Goblin Tokens out this turn will drastically reduce their block. I’d block no Goblin Tokens this turn and take 3. Then next turn I’d attack with 12 Goblin Tokens, leaving 2 back to play around a removal spell. If we can get a block under Goblin Rabblemaster, the most we could possibly take next turn is 9, so we’re pretty safe. Then we’ll have at least 11 tokens with our opponent at 10, so they would’ve needed answers to two tokens beyond what’s already on board in order to survive, which should be difficult given how they are limited on mana.
Anthony LaVerde
I would let this damage through, and then I would attack with twelve Goblin Tokens on our turn. The reason for this is simple, we’re only dying if Goblin Rabblemaster can get through, and attacking for twelve here puts them on a two turn clock. If they attack with everything the following turn, we only block the Goblin Rabblemaster and go down to three, then kill them on the swingback even if they play a creature. Keep in mind that everything has to attack except the Goblin Rabblemaster. If they don’t attack with Goblin Rabblemaster, we don’t block at all so we can still push lethal through the Goblin Rabblemaster and another creature. The reason we attack for twelve and leave two Goblin Tokens behind is because we only need to attack for twelve, and this doesn’t leave us dead to a Chandra, Torch of Defiance that they can use the -3 ability on if we only left one goblin behind to block. The other thing worth noting is that we are dead to a Fiery Confluence regardless, so there’s no reason to play around it dealing six damage to us, and Fiery Confluence is the only thing in their deck that can deal at least three damage to us directly to make them win through our combat math. As long as you follow this combat math and nothing weird happens, you should be all set to win.
Landon Sworts
I’m not the best with combat math but my gut tells me that I want to let this current attack go through with no blocks. On our next turn, I would leave back 1-2 blockers so I could chump block the bulk of the damage coming from Goblin Rabblemaster to keep us alive for one more turn to attack for lethal.
Alex Poling
I would not block here and go to 13. On my turn, I would attack with 13 Goblin Tokens and leave one back to block the Goblin Rabblemaster. They, of course, would block two of them and go to 9 life. They could swing back for lethal, but I have a chump blocker for the Goblin Rabblemaster. The tokens and the Legion Warboss are forced to attack the next turn and then I have enough creatures on the following turn to win.
Daniel Lee
This combat math is relatively straightforward since Goblin Rabblemaster forces all other Goblin Tokens to attack. So… next turn we are only facing lethal if they attack with the Goblin Rabblemaster, which does not have Trample. We should not block this turn. We go to 13. Next turn, we attack with 12 Goblin Tokens, leaving 2 back. Then even if our opponent follows up with Lightning Bolt and attack with everything, we have one Goblin Token to block the Goblin Rabblemaster, take 8 damage and fall to 5 life, then attack with 10 Goblin Tokens for lethal!
Alex McKinley
Blocking and trading tokens this turn does not seem like a winning line. I would choose to not block this turn. Because of the effect of Goblin Rabblemaster, the opponent is not blocking with more than one creature for the next couple of turns. For the first attack, I would attack with all but 2 of the Goblin Tokens. This puts the opponent to 10, after they block two of the tokens (leaving 12 remaining). Leaving the second token back gives outs to sol land into Chandra, Torch of Defiance. When the opponent gets to attack again, after blocking the Goblin Rabblemaster, we take 8 and go to 5. The opponent is dead to our attack back, even if they have another creature.
SITUATION #3 – Echo Storm
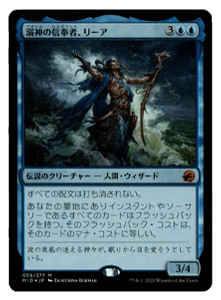
In our third scenario, we are playing against a new deck called Echo Storm. Echo Storm is a very interesting take on Storm, that looks to get Echo of Eons into the graveyard with either Lion’s Eye Diamond or Entomb. From there, the Echo Storm player either draws seven cards and fizzles, or they storm off and kill their opponent. To help mitigate the risk of an opponent drawing seven cards from Echo of Eons, Echo Storm plays Narset, Parter of Veils. Narset, Parter of Veils essentially changes the Oracle text on Echo of Eons to read, “Discard your hand, shuffle your graveyard into your library, draw seven cards, your opponent discards their hand, shuffles their graveyard into their library and draws one card.” While Echo Storm’s primary win condition is Tendrils of Agony, the deck also plays Monastery Mentor, which can get out of hand very quickly if not dealt with immediately.
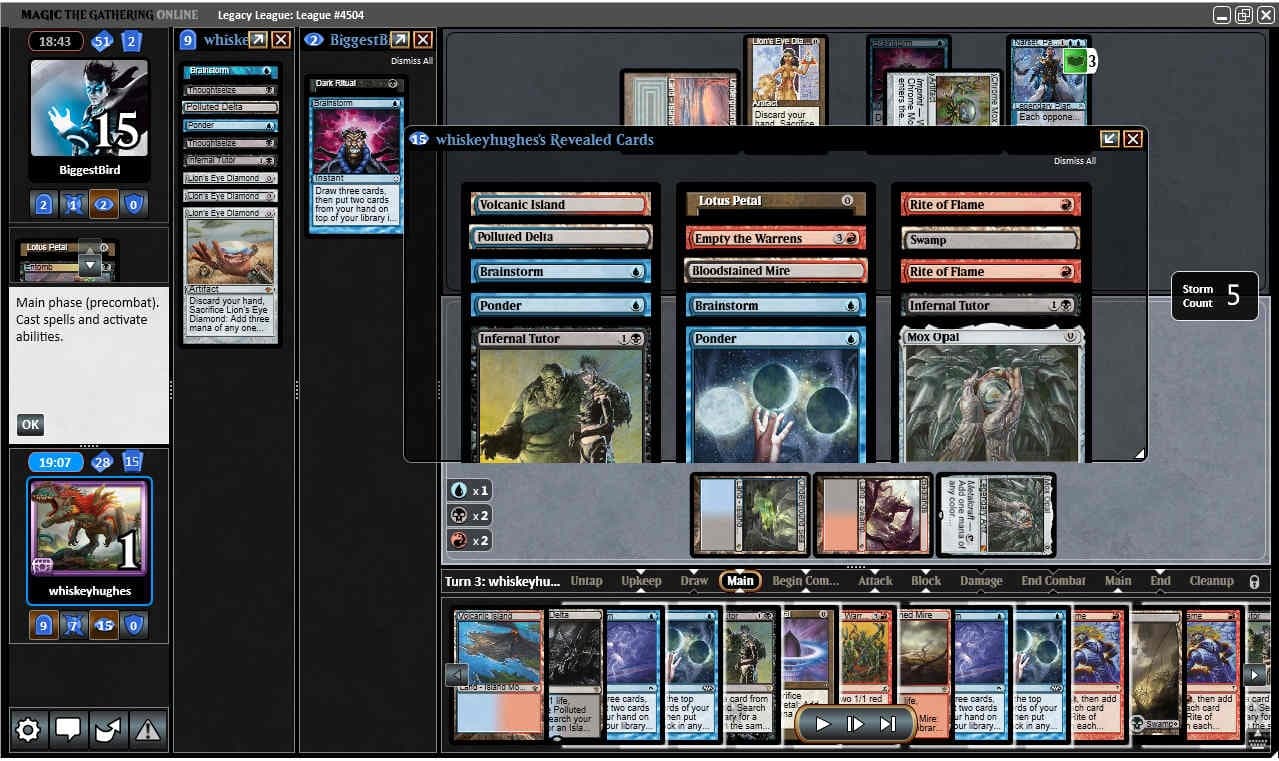
In this scenario, we are currently on turn three. In the two turns prior, our opponent made us draw seven cards, and then played a Narset, Parter of Veils. We came close to dying, but our opponent was one mana short of casting an Entomb for Echo of Eons to continue casting spells. Lucky for us, variance gave us a hand that could Thoughtseize our opponent, taking their Entomb, and then cast Ad Nauseam with a lot of mana floating and the ability to play a Land for turn. Unlucky for us, we bricked pretty hard on the Ad Nauseam. I was so excited about the fact that our opponent fizzled, that I missed the fact that I had a natural Storm kill, and ironically we both fizzled. Or did we? How do you either win or put yourself in a winning situation?
Special Guest
Tom Hepp
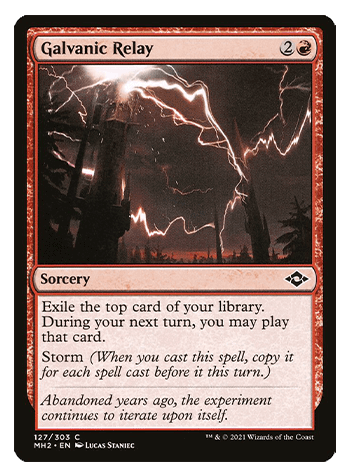
Narset, Parter of Veils is normally a pretty big problem vs a hand full of cantrips, but in this case she helps contribute to a winning line by allowing us to put cards that were preventing us from getting hellbent for Infernal Tutor (aka Demonic Tutor) on top of our library without drawing any additional cards. We start with RRBBU floating and storm 5, then play Volcanic Island and tap for a U, cast Infernal Tutor revealing Lotus Petal (Storm 6, RBUU), both Rite of Flames (Storm 7&8, RRRRBUU), and both Brainstorms putting Bloodstained Mire, Swamp, Polluted Delta, and Empty the Warrens on top of out library (Storm 9&10, RRRRB). From there we cast both Lotus Petals and Mox Opal sacrificing the tapped Mox Opal (Storm 11-13, RRRRB). We tap Mox Opal for U and sacrifice the Lotus Petals for UR and then cast both Ponders (Storm 14&15, RRRRRB). That leaves just Infernal Tutor in hand with enough mana to tutor (Storm 16, RRRR) for and chain Burning Wish (Storm 17, RR) into Grapeshot for lethal damage and then some.
#TEAMTES
Josh Hughes
I think the easy play here is casting a big Empty the Warrens. Against a Storm deck, this is a huge risk, especially being at 1 life. After thinking about the best way to get Hellbent, I figured out a way to use Narset, Parter of Veils to our advantage.
Start by casting Rite of Flame (Storm 6, 3R, 1U, 2B)
Cast the second Rite of Flame (Storm 7, 5R, 1U, 2B)
Infernal Tutor revealing Lotus Petal (Storm 8, 4R, 1U, 1B)
Cast Brainstorm (Storm 9, 4R, 1B) put back Polluted Delta, and Swamp
Play Volcanic Island
Cast Brainstorm using Volcanic Island (Storm 10, 4R 1B) put back Empty the Warrens and Bloodstained Mire
Play both copies of Lotus Petal (Storm 12, 4R, 1B)
Play Mox Opal (Storm 13, 4R, 1B)
Play Ponder using Mox Opal (Storm 14, 4R, 1B)
Play Ponder using Lotus Petal (Storm 15, 4R, 1B)
Play Infernal Tutor cracking your last copy of Lotus Petal now that you are Hellbent – (Storm 16, 4R)
Play Burning Wish (Storm 17)
Play Grapeshot for (Storm 18)
Bryant Cook
Haha! This is very cool, using the Narset, Parter of Veils against them! The first thing to do is realize you need three blue mana to win this game due to the cantrips and that you need to get rid of three of the four lands for Hellbent. Using a black and a red mana, cast Infernal Tutor revealing Lotus Petal (Storm 6 — UBR), play Lotus Petal, Lotus Petal, Mox Opal, and Brainstorm with the blue mana floating (Storm 10 — BR). After putting two lands on top of your library, you can play Volcanic Island and cast another Brainstorm putting the third land and Empty the Warrens on top of your library (Storm 11 — BR). Now you can use a Lotus Petal and Mox Opal to cast the two copies of Ponder in your hand (Storm 13 — BR). Use the final Lotus Petal to cast both copies of Rite of Flame (Storm 15 — BRRRRR), Infernal Tutor (Storm 16 — RRRR), Burning Wish (Storm 17 — RR), and Grapeshot (Storm 18). I really enjoyed solving this one 😀
AJ Kerrigan
This is a pretty exciting and convoluted kill that I would almost certainly get a slow play warning trying to figure out in person, but let’s try to go through it. First, we start by casting both of our Rite of Flames, and playing and tapping our Volcanic Island for blue mana. We now have 5 red, 2 blue, 2 black, and 7 storm. Now, we Infernal Tutor for Lotus Petal using black and red, and cast both Lotus Petals and the Mox Opal, making 2 blue and 1 black. So now, we have 4 red, 4 blue, and 2 black, and the storm count is 11. We cast two Brainstorms but we can’t draw so we just put two cards on top of our library, putting back the other three lands and Empty the Warrens, leaving us with 4 red, 2 blue, and 2 black and 13 storm. We then cast both Ponders, leaving us with 15 storm, 4 red, 2 black, and just an Infernal Tutor in hand. Finally, we cast Infernal Tutor for Burning Wish and use Burning Wish to get Grapeshot, dealing our opponent 18 if I did the math correctly. This is a pretty crazy situation though, so I have no idea if I just miscounted a mana somewhere.
Anthony LaVerde
This situation is really cool, and I’m sure that a lot of players would miss this line if they were in the match. I’d start by playing Volcanic Island, then use a floating red and black mana to cast Infernal Tutor to grab a second copy of Lotus Petal. From here I would play the pair of Lotus Petal and the Mox Opal, and then cast both copies of Brainstorm off of the Volcanic Island and our floating blue mana, this doesn’t draw us any cards, but let’s us put the three excess lands as well as Empty the Warrens all on the top of our deck. From here I would use the Mox Opal and a Lotus Petal to cast both copies of Ponder so we can get them out of our hand. Then, I would cast both copies of Rite of Flame. At this point, we only have Infernal Tutor in hand now and we have four floating red mana, one floating black mana, and an unused Lotus Petal, we are also now hellbent. Finally, I would cast Infernal Tutor to get Burning Wish, cast Burning Wish to get Grapeshot, and cast Grapeshot for eighteen copies, which is certainly lethal. This line also requires exactly all of our available mana which is really cool. Awesome scenario Josh!
Landon Sworts
I think it’s very likely that we can cantrip into a Burning Wish or Lion’s Eye Diamond. I would use the copies of Ponder to find either Burning Wish or Lion’s Eye Diamond and win on the spot with our sideboard copy of Tendrils of Agony.
Alex Poling
I would play out all of the rituals are artifacts to generate an additional 3 storm. Use the blue mana floating to cast a Ponder. I wouldn’t get the draw, but I just want to build up storm. After getting my storm count higher I would cast Empty the Warrens with at least 8 storm for 16+ Goblin Tokens. The goal would be to avoid dying on my opponent’s next turn and try to attack for lethal on my next turn.
Daniel Lee
Unfortunately, I don’t see a deterministic line here. What we can do, though, is get a lot of chances to find a Burning Wish. We should cast Rite of Flame twice (Storm 7, 1U 2B 5R in pool), then Infernal Tutor for Lotus Petal (Storm 8, 1U 1B 4R in pool). Follow that with both Lotus Petals and Mox Opal (Storm 11, 1U, 1B, 4R in pool). Then we can cast up to 2 copies of Ponder and 1 Brainstorm looking for the last Lion’s Eye Diamond or any of the 4 copies Burning Wish in order to finish our line and kill our opponent.
Alex McKinley
Wow this is close. We have 9 cards that are preventing us from getting hellbent for Infernal Tutor. I started approaching this by looking at this by casting Brainstorm to effectively discard cards. At maximum, we can get access to 4 blue mana (by casting Infernal Tutor for Lotus Petal). However, this leaves not enough black mana to be able to Infernal Tutor for Burning Wish for Tendrils of Agony. Casting Empty the Warrens instead of one of the cantrips does not leave enough mana to do anything. If winning this turn is the goal, the only option left is Grapeshot. My line would look like this: play Swamp, Infernal Tutor for Lotus Petal (leaving U, B, R floating), cast Lotus Petal, Lotus Petal, Mox Opal (storm 8), Brainstorm (put back two fetchlands, B, R floating, storm 9), Brainstorm off of Mox Opal (put back Volcanic Island and Empty the Warrens, storm 10), Ponder off of a Lotus Petal (storm 11), Ponder off of a Lotus Petal (storm 13), Rite of Flame (B, RR floating, storm 13), Rite of Flame (B, RRRR floating, storm 14), Infernal Tutor for Burning Wish (tapping Swamp, B, RRR floating, storm 15), Burning Wish for Grapeshot (RR floating, storm 16), Grapeshot with all targets on opponent (storm 17, no mana floating).
I’ve been consistently impressed by how incredible Mox Opal has been. My initial fear with playing it was Karn, The Great Creator. While Karn, The Great Creator is terrifying, I have found that the London Mulligan has helped me have more consistent turn one plays. I think that one of the keys for success in the post London Mulligan world is to really take advantage of mulliganing. While that is easier on Magic Online because you just click a button, it is something that should be practiced while playing paper magic as well.
Keep storming on!