Hello everyone and welcome back to Reading the Ropes!
In the last article, we covered the basics of the various win conditions in the deck, and in this article we are going to do a deeper dive into that topic. There are a lot of small intricacies to The Epic Storm that can increase your chances of winning any given game, but none of those things matter if you aren’t actually sure how to win the game! This article will seek to provide an understanding of each win condition in the deck, as well as the various ways that you can actually win the game with them. The goal, with a little practice applying what you’ve learned, is that you will be able to take a hand that is capable of winning the game and recognize which win condition is the best choice and way. Let’s go ahead and start with Storms most iconic win condition.
Tendrils of Agony
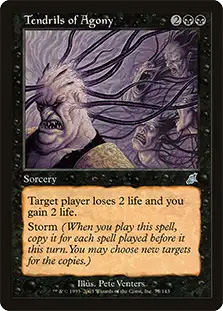
This is the card most heavily associated with the Storm mechanic, and for good reason. Even if your opponent avoids taking any damage in a game, you are only nine spells and a Tendrils of Agony away from putting their life total to 0. You’ll notice, if you look at most lists of The Epic Storm, such as the one on this website, that we don’t actually play Tendrils of Agony in our main deck. This may be confusing, since I just mentioned that Tendrils of Agony is one of the central cards of the Storm mechanic, but it’s important to recognize that winning the game with Tendrils of Agony is not exactly an easy task.
Casting nine spells in a single turn requires some difficult gymnastics for both having enough cards and enough mana to do that. Often times, if we are winning thanks to Tendrils of Agony, it is because our opponent somehow took a lot of damage (to cards like Misty Rainforest or Gitaxian Probe) meaning that we need far fewer spells or, in the more likely scenario, we are using Ad Nauseam to draw a lot of cards and get access to a lot of mana. If you read the previous article, you’ll remember that I said that the average converted mana cost of our deck is around 0.75. This means that with Ad Nauseam, we can easily draw between 10 and 20 cards, which provide enough mana and enough cheap spells to play a lethal Tendrils of Agony.
If it is true that we are often only winning with Tendrils of Agony after drawing a ton of cards, this usually means that we’ll often also have access to one of the four copies of Burning Wish in our deck. By leaving Tendrils of Agony in our sideboard, we keep a card out of our main deck that doesn’t do a whole lot until we are already winning the game and we keep the average converted mana cost of our deck lower for Ad Nauseam. Then, once we’ve drawn a lot of cards and made a lot of mana, we can just Burning Wish for the Tendrils of Agony.
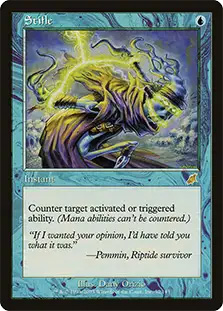
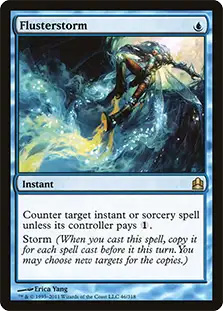
The other situation in which Tendrils of Agony can make our opponent lose all of their life is against a counterspell-heavy deck. In some situations, the plan against decks full of counterspells is to play a very long game where you play as many lands as possible and sculpt your hand to the best of your ability. Then, when the time is right, you start casting all of your spells, allowing a bunch of them to get countered. It is important to remember that each counterspell that your opponent casts also contributes to your Storm count, so then if you have Tendrils of Agony in your hand, you’ve presumably created a lot of Storm and can cast it for lethal. Your opponent, left only with a counterspell or two in hand, will be helpless. Remember that countering a Storm spell still allows all of the copies to resolve, so a single counterspell will not do the trick for them. The only real exceptions are Flusterstorm and Stifle. Flusterstorm can counter every copy of your spell, and Stifle can prevent the Storm spell from creating any copies at all.
All that said, Tendrils of Agony‘s biggest issue is that it rarely wins the game by itself, and so while you will win a lot of your games by casting it, it is rarely the piece that was most important to your victory. I mentioned that Ad Nauseam is your primary way to make Tendrils of Agony lethal, so let’s talk a bit about that next.
Ad Nauseam
While Ad Nauseam isn’t exactly a win condition in that it doesn’t kill your opponent by itself, it effectively functions as one in combination with the other win conditions in your deck. As long as you are starting from a reasonable life total, Ad Nauseam will usually give you everything you need to win the game. From lower life totals, it can be a bit dangerous unless you already have a lot of extra mana to work with.
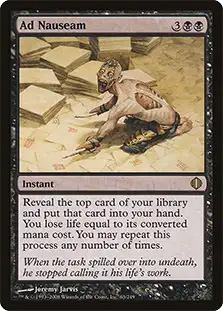
Something important to understand about Ad Nauseam though is that it doesn’t always need to win the game the turn you cast it. If your opponent does not have the ability to deal you very much damage, you can draw 10 to 15 cards, discard down to hand size leaving yourself with the perfect hand, and then win next turn when you have all of your lands untapped again. While this is usually not your primary goal when casting Ad Nauseam, learning when you should stop and try to win next turn is important. Generally, you should look at everything you have access to and figure out what else you would need to win the game. If you still need more pieces than you can reasonably expect to find with how much life you have left, you may want to consider stopping. If you still have a lot of life to work with though and you are only one or two cards away from winning, keep going. Remember that once you’ve cast Ad Nauseam, the highest mana cost card in your deck is Empty the Warrens most of the time, and everything else costs two or less, so as long as you have more than four life, you can freely draw additional cards. Just be sure to watch out for random Lightning Bolts or Deathrite Shamans that your opponent might be able to deal you extra damage with. If you are worried about those, it is in your best interest to draw no more cards than you need to.
Ad Nauseam has two major flaws that often prevent it from winning the game. The first is that you generally need to have a lot of life or, if you have a bit less life, a lot of mana to work with. If your opponent has been pressuring you with Delver of Secrets and you now only have 8 life left, Ad Nauseam is unlikely to do the trick except as a last ditch effort if you have no other choice. The second flaw is that it is easily countered and because of its high mana cost, this can often be the expense of significant resources. If you play a land, cast two Dark Rituals, and use the mana to cast an Ad Nauseam on the first turn, you are down to only three cards in hand. If they have Force of Will for your Ad Nauseam, you may have a tough time winning that game. In longer games though, you can pay for Ad Nauseam using mostly just your lands and so if it gets countered, you didn’t lose too many resources. Since Ad Nauseam is an instant, you can try casting it on your opponents end step to get rid of their counterspell, and then untap and have access to all of your mana again to try and win with something else. In that case, what do we do when our life total is low our or opponent has a counterspell ready for our Ad Nauseam?
Empty the Warrens
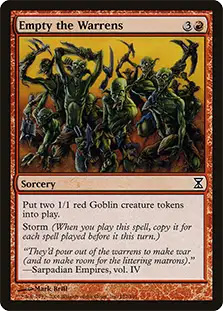
If you don’t have as much life as you would like, or your opponent has access to a counterspell, we have the last of our primary win conditions which is a card that makes The Epic Storm unique when compared to a lot of other Storm decks. This card is Empty the Warrens, and it competes with Ad Nauseam for the card that will win you the highest percentage of your games. Empty the Warrens may seem innocuous on the surface, but in reality is a card that can easily beat your opponent on the second or third turn.
With Tendrils of Agony, we needed a lot of spells in order for it to do anything. The issue with Tendrils of Agony is that against most Legacy decks, using all of your resources to take away only half of their life total will quickly lose you the game despite the life that you gain from each copy. This means that in most cases, Tendrils of Agony requires you to fully commit to have it do anything and even sometimes then it falls short. Empty the Warrens on the other hand is more than happy to defeat your opponent even if you have fewer spells to cast. Making two Goblin tokens per spell means that even if your opponent is at 20 life and you can only cast four spells, you are still likely to win the game. Whereas Tendrils of Agony would have just put them to 10 life and then had you sitting their as your opponent won the game from 10 life, the Goblin tokens will just keep attacking until they are at 0 life. Very few cards, especially that people play in the main deck, can stop a reasonable horde of Goblins. Even an army as small as 6 tokens can win the game against some decks if made on the first turn, meaning that you can commit fewer resources to Empty the Warrens and still have it be meaningful.
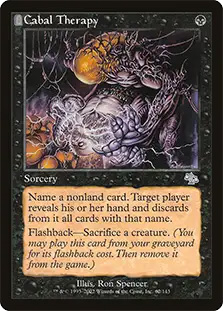
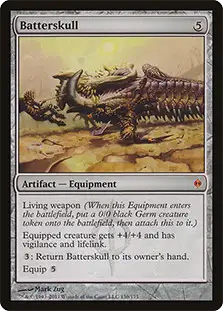
Empty the Warrens comes with the same benefit as Tendrils of Agony in that there are very few cards that deal with all of the copies, so a single Force of Will will be helpless if your opponent was waiting to counter your win condition. The two biggest things to be wary of with Empty the Warrens are wrath effects (Toxic Deluge, Terminus, Golgari Charm) and Stoneforge Mystic searching up a Batterskull. Your best way to combat these is Cabal Therapy. With the first casting of Cabal Therapy, you can get rid of their counterspell, and now that you know their hand, you can sacrifice one of the Goblin tokens to flash it back and get rid of their specific answer to Empty the Warrens. Against creatures, you can usually make enough Goblins to get around them (though make sure to do the math since this isn’t always true), but Batterskull can be tough since it gains them 8 life per turn cycle. There is a nice table that explains how many Goblin tokens you need to beat Batterskull at various points in the game, which can be found here.
Empty the Warrens is definitely the win condition that you are most likely to be able to cast on turn one given that you need very few cards and only four mana in order for it to be good. This is why many lists play more Empty the Warrens in the sideboard, as against decks that are very fast and have a lot of counterspells such as Delver of Secrets decks, it can be difficult to win with Ad Nauseam, but a first turn Empty the Warrens for 8 or more Goblins will almost always win the game. Playing more in the sideboard allows you have a better chance of having one in your opening hand after sideboard, though it’s important to still usually leave one in the sideboard, as you want your Burning Wishes to always have something good to get from your sideboard.
The main time that Empty the Warrens is bad is if you are facing down lethal damage from creatures that have flying, or if your opponent is playing a fast combo deck such as another storm deck. The issue with Empty the Warrens against combo decks is that you typically give them one or two turns before they actually take lethal, meaning they have ample time to assemble and use their combo unimpeded. Cabal Therapy can do a lot of work in those situations to help make sure your opponent is very far from winning the game, but even then you are still at their mercy for a few turns.
Other Win Conditions
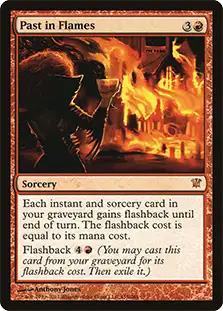
There are three other win conditions that I will touch on more briefly, as they tend to be secondary win conditions in The Epic Storm. The first is Past in Flames, which is a card that other variants of Storm are more heavily built around, but that we use more sparingly. The issue with Past in Flames is that a lot of our mana comes from cards that can’t be cast with Flashback such as Chrome Mox, Lotus Petal, and Lion’s Eye Diamond, and so it is often difficult to generate enough mana to win the game after casting Past in Flames. That said, it is still an important card to understand, so later in the series I’ll dedicate some time to explaining the various situations where Past in Flames is good and how to win with it. In general, you Past in Flames is at its best against counterspells because of Flashback, and good for longer games where Ad Nauseam and Empty the Warrens are no longer good enough, but your graveyard is stocked with good spells to flashback.
The second backup win condition is Telemin Performance. This card has been in and out the deck for a few years, and where it shines is against other combo decks as well as Lands. Against other combo decks that don’t have creatures, such as other Storm decks, it generally wins the game on the spot for only five mana. For just seven mana, you can Burning Wish for Telemin Performance and cast it, which will cause them to lose on their next turn assuming they have no creatures in their deck, since their entire deck is milled. Against creature combo decks such as Reanimator or Sneak & Show, the hope is that you get a Griselbrand or an Emrakul, the Aeons Torn. Griselbrand will generally allow you to win on the spot since it acts similarly to Ad Nauseam, and Emrakul, the Aeons Torn will generally win the game if your opponent gives you one additional turn to attack with it. Telemin Performance helps fill the gap here that Ad Nauseam leaves since Empty the Warrens is not great against fast combo decks. Against Lands, they generally have no creatures in their deck, so similar to against creature-less combo decks, it will win the game instantly. That said, many Lands players have adapted to boarding in creatures like Tireless Tracker in order to combat Telemin Performance, meaning that it loses a lot of value after the first game.
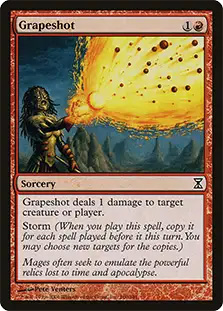
The final backup win condition is Grapeshot. Grapeshot needs even more work than Tendrils of Agony, so it rarely wins the game by itself, but it can often deal the last few points of damage if one of your other win conditions failed to get the job done. Perhaps your Tendrils of Agony only got them to four life, or your Goblin tokens from Empty the Warrens could only attack them to four life before you they drew a Golgari Charm. In those cases, Grapeshot can be a cheap and efficient way to deal the last few points of damage when you are otherwise low on resources. Grapeshot is more often used to deal with problematic creatures like Thalia, Guardian of Thraben and Gaddock Teeg, but its overall versatility is what keeps it in the sideboard.
Wrap-up
Overall, the Epic Storm has more options for winning the game than a lot of other combo decks, which makes it fairly versatile in its ability to respond to the various answers our opponents will present. While many combo decks can be crippled by a single piece of hate such as a Grafdigger’s Cage or a Leyline of Sanctity, The Epic Storm has enough versatility in its win conditions that it can often get around more specific hate cards.
In the next article, I’m going to talk a bit about how a typical combo turn actually works. Now that we understand the various win conditions in the deck, it will be important to understand the processes that go into actually winning with them between generating mana, casting your spells, and actually finding your win condition when you need it.
This article ended up being a bit longer than I anticipated, and so I’m interested to hear some feedback. An alternative option for this series is to write a bit less about each topic and cover more topics more article, which would allow us to move more quickly but at the cost of some more specific information. I’m curious what you would prefer in terms of length and formatting, so let me know in the comments what your thoughts are. My goal will be to reduce turnover time between articles as well. There was about a month between the first and second article, but if all goes well, I’ll be able to cut that gap down to a shorter time frame.
Thank you for taking time to read the second installment of Reading the Ropes, and I hope that you learned something interesting!