Turbo Depths is a combo deck that tries to generate a Marit Lage token (20/20 Flying Indestructible) by either removing all of the counters with Vampire Hexmage or by creating a copy of Dark Depths with 0 counters using Thespian’s Stage. They try to do this very quickly (hence the name “Turbo Depths”), but also trying to balance that with protection and disruption. Like most combo decks their deck is full of ways to find their combo, discard spells, and cards that protect their Marit Lage from removal spells, like Sylvan Safekeeper. This deck has a lot of the same aspects as our deck, a fast kill, disruption in the form of discard, and a toolbox with Crop Rotation, where we have Burning Wish. There are quite a few differences, however, and some fairly neat interactions in this matchup. Turbo Depths has only been around a couple years and only recently been finely tuned. So, let’s get down to it and break this matchup down so we can have an actual game plan and a better understanding next time we sit down across from a Turbo Depths player.
How does Turbo Depths matchup against TES?
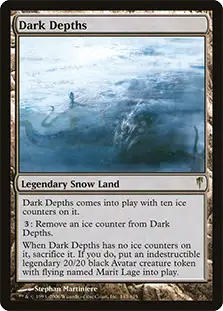
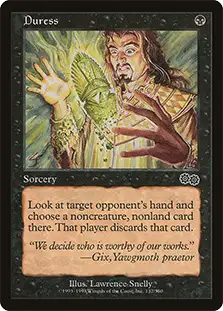
Thoughtseize, Duress – A similar disruption package that we have, between 6-8 discard spells. These cards can be used proactively or reactively based on each others hands and speeds at which we can combo. If they have a faster hand then they will probably use their discard spells to hit our discard spells to make sure they aren’t disrupted. If we have a faster kill then it could be a game of both players being down on cards taking each others combo pieces. There isn’t much more to say about these spells. If you’ve been playing this deck, or even legacy for a while, then we should be pretty used to playing against discard spells.
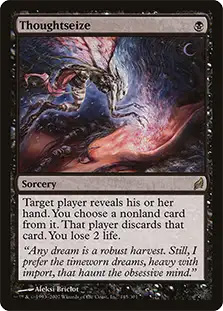
Vampire Hexmage, Dark Depths, Thespian’s Stage – These are the combo pieces that they are trying to assemble together. Both Thespian’s Stage and Vampire Hexmage remove the counters from Dark Depths to create the Marit Lage token. Because two of their three combo pieces are lands they can be tricky for us to interact with, and can be very quick since it doesn’t require expensive spells or many cards. It’s just 1 + 2. We often have to use discard on their search effects since our discard can’t hit their hands.
Sphere of Resistance, Thorn of Amethyst – These are potential cards that our opponent could bring in against us. They’re not in every list, but I have seen some people with at least 1 of these cards, and sometimes even a split. If they have these cards in their sideboard then they become the most important cards of the matchup because we can’t beat one of these if they resolve. The way we play and sideboard changes whether we see these lock pieces or not, but I will get into more of that in the sideboarding section. The main takeaway is that we just need to understand these cards are possible, but not guaranteed and we need to be paying attention in game 2 whether we see them or not, because it changes our sideboarding game plan.
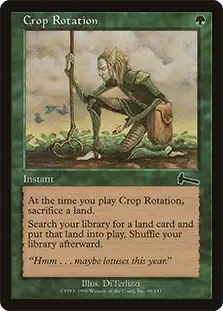
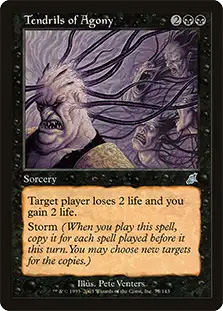
Bojuka Bog, Surgical Extraction – Most lists play a Bojuka Bog in the main deck and often have some copies of Surgical Extraction in the sideboard. While graveyard hate usually doesn’t matter against us there are still opponents who bring it in, so we need to be aware of it. There are scenarios where it could be good for us for example, if we go for a Dark Petition route they can Crop Rotation for the Bojuka Bog to take us off Spell Mastery and completely stop us in our tracks. In combination with all of their discard they could hit a Burning Wish and then Surgical Extraction, it forces us to only be able to make goblins unless we bring the Tendrils of Agony in.
Deck List
Main Deck
Ways to win this matchup
Killing Them and Our Game Plan This matchup usually plays out in two different ways, both players using lots of discard to strip each others hands or a flat out race to the combo with minimal interaction. We prefer the games that are about racing because their deck operates much better with minimal resources since they are just trying to assemble 1 + 2 and we need a slightly more than that. Our game plan doesn’t change very much whether we are on the play versus the draw. We have to be quick and a little interaction could be useful, but not mandatory. The critical turns for us are 2-3. We have no real rush or pressure to try and combo off on turn 1. The only exception is if we get a look at their hand and goblins may be good enough. Past turns 1-2 usually Empty the Warrens is not good enough because we could die with them in play. We are also not pressured to combo off on turn 1 because we don’t fear anything like a Chalice of the Void or Sphere of Resistance coming down. The reason the main turns is 2-3 is because that is typically 1 turn faster than the opponent can kill us and that’s exactly where we want to be. This strategy doesn’t change at all when we head into the post board games, but it is crucial we keep this game plan in mind when evaluating opening hands and utilizing cantrips.
Sideboarding
Standard Sideboarding
-2 Cabal Therapy, -1 Empty the Warrens
+2 Chain of Vapor, +1 Tendrils of Agony
Sphere of Resistance Sideboarding
-3 Cabal Therapy, – 3 Duress, -1 Empty the Warrens
+3 Abrupt Decay, +2 Chain of Vapor,
+1 Tendrils of Agony, +1 Bayou
If we see that they have a Sphere of Resistance or a Thorn of Amethyst then I would make these additional changes. These changes give us a better answer to those cards. In game 2 I always make the assumption that they have them. If they do and we didn’t sideboard to prepare for it, then we only have 2 copies of Chain of Vapor as answers, and that’s not reliable enough. After game 2 if I didn’t see any of these cards then I would revert these changes and play like they don’t have them for game 3.
I approach this matchup similar to other combo decks. I value speed of trying to assemble and combo off but also being able to disrupt the opponent in a timely fashion. One of the best ways to disrupt them is on the table instead of by attacking their hand. Their combo is assembled with their lands which our discard can’t hit. They also have too many redundant tutor effects to try and attack that angle. I bring in the two copies of Chain of Vapor because it is a great way to break up their combo. If they make a Marit Lage token and we bounce it that could set them back multiple turns. Especially post board when there’s a good chance they remove all of their Sylvan Safekeepers. If they see Chain of Vapor in our hand then they are almost obligated to take it with a discard spell, ultimately protecting our key combo pieces. If they decide to take our combo pieces then they have to wait until they find more discard for Chain of Vapor. Like versus other combo decks Empty the Warrens is pretty bad because we can make 40 goblins and they can just untap and kill us. If there is a scenario where Empty the Warrens is good we still can always Burning Wish for it. Tendrils of Agony comes in because most lists have Surgical Extraction in the sideboard. While it’s not very good against us there’s still a lot of players who bring it in, so we best try to plan for it.
Game Play
One of the best ways to learn about a particular matchup is to just play it out. We can theorize all day, but some of the best ways to find out facts and put our ideas to the test is to jam some games, so with that being said let’s get right into the first game.
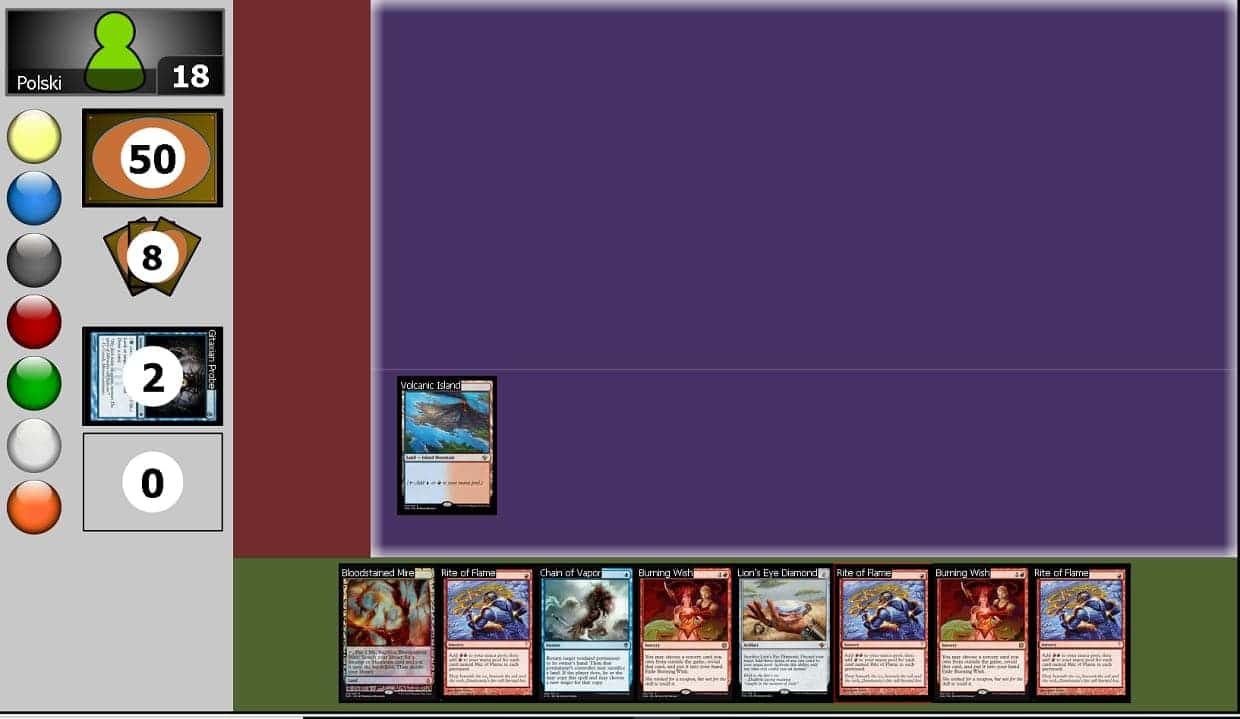
I win the die roll, so I am on the play, and I draw 7 cards into my opening hand.

In the dark verse an unknown opponent I am definitely keeping this hand. Not only would I keep this hand, but I would go for it on the first turn by playing out all our artifact mana and then casting Burning Wish for Empty the Warrens and making 12 goblins. If they have a Force of Will or we die on their turn then so be it, that’s just playing the odds. Since we know the matchup in advance though would I still make this play? The answer is yes I would. Passing the turn exposes us to discard and makes Empty the Warrens a lot worse because it makes it more likely the opponent can race the goblins. As it stands we can win the game on our turn 3 (2 attacks) with 12 goblins. This is what I end up going with knowing that they can’t kill me on turn 2, so this is a pretty safe win from here despite knowing that Empty the Warrens is typically not good vs other combo decks. Up 1 game.
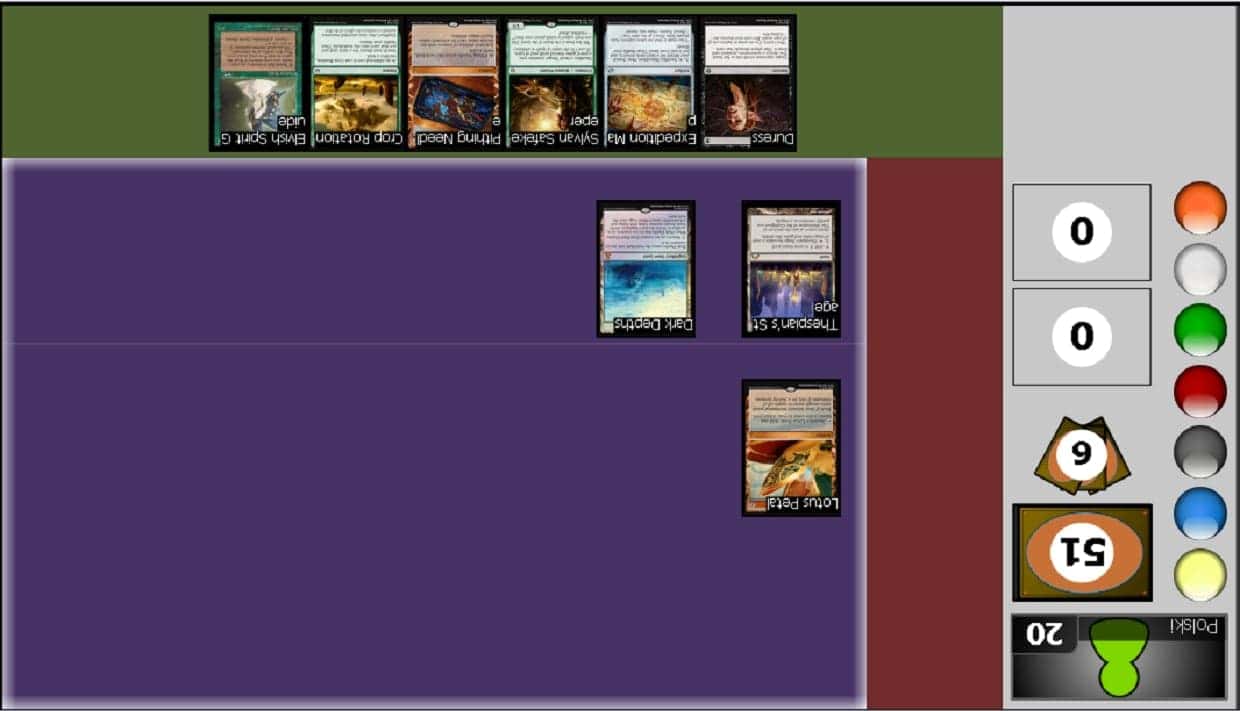
In game 2 we are in an interesting scenario here. We have lots of mana, tutors, and a bounce spell. This seems like the perfect setup except they have us dead on their next turn if we have no interaction or the kill. Once I cast Gitaxian Probe I see they also have a Crop Rotation with the ability to grab a Bojuka Bog. The good news is that he can only do 1 of those things this turn.


We have a couple different options we can take here:
- We could play out all of our rituals, artifact mana, and lands and cast Burning Wish for Dark Petition into Ad Nauseam and hope he doesn’t cast Crop Rotation for Bojuka Bog. There’s a chance he doesn’t hoping we miss on our Ad Nauseam and then he untaps and kills us. I don’t think this is very reliable because it involves us sacrificing our Lion’s Eye Diamond and going all in, so why wouldn’t he cast Crop Rotation and then just plan on killing us over the course of 2-3 turns later since we will be without any resources left over.
- We also could just pass the turn and if he goes for his combo then we can just bounce it which will set him back quite a bit to allow us to win while he tries to recover. Our hand is also really resilient vs his Duress if he tries to stop us. I think this is a very good option, but could go South if they opt not to go for it. It is fairly suspicious to pass the turn when we are dead on board, but they may just force it.
- My last option could be to play the land, Lion’s Eye Diamond, and then all of the copies of Rite of Flame (7 red mana) into Burning Wish for Empty the Warrens. All of this can be done without cracking Lion’s Eye Diamond and by only tapped 1 land. This would save our other land for the Chain of Vapor on his Marit Lage token on our end step. If the opponent decides to Bojuka Bog us in response to the third Rite of Flame then we can just sacrifice the Lion’s Eye Diamond to pay for Empty the Warrens because we wouldn’t need the Chain of Vapor anymore since it would take them off of their combo.
I ended up taking the third option and he did not use his Bojuka Bog, but instead tried to combo off on my end step which was met with the Chain of Vapor and that set him too far behind and I won within 2 turns from here.
2-0
The TES community is one I love for many reasons, but my favorite reason is that we can talk through plays and lines and it’s interesting to hear how other people play the deck and approach situations. This scenario is a great opportunity to hear how other people approach the same deck we play and how their thought process led to the decision that they made which you may not have ever seen. I always like to think about and discuss every line possible to be able to sort through all of their pros and cons, risks, and odds since a lot of the decisions we make are about odds. There are some situations where we are nearly 100% to win or such high odds that there is 1 clear decision, but talking about those other circumstances are what makes us better storm and magic players.
I hope we can have a discussion on the last scenario and I learn from the community just as much as the readers, but until the next one let’s keep the conversation going.
Standard Sideboarding
-2 Cabal Therapy, -1 Empty the Warrens
+2 Chain of Vapor, +1 Tendrils of Agony
Sphere of Resistance Sideboarding
-3 Cabal Therapy, – 3 Duress, -1 Empty the Warrens
+3 Abrupt Decay, +2 Chain of Vapor,
+1 Tendrils of Agony, +1 Bayou
If we see that they have a Sphere of Resistance or a Thorn of Amethyst then I would make these additional changes. These changes give us a better answer to those cards. In game 2 I always make the assumption that they have them. If they do and we didn’t sideboard to prepare for it, then we only have 2 copies of Chain of Vapor as answers, and that’s not reliable enough. After game 2 if I didn’t see any of these cards then I would revert these changes and play like they don’t have them for game 3.
I approach this matchup similar to other combo decks. I value speed of trying to assemble and combo off but also being able to disrupt the opponent in a timely fashion. One of the best ways to disrupt them is on the table instead of by attacking their hand. Their combo is assembled with their lands which our discard can’t hit. They also have too many redundant tutor effects to try and attack that angle. I bring in the two copies of Chain of Vapor because it is a great way to break up their combo. If they make a Marit Lage token and we bounce it that could set them back multiple turns. Especially post board when there’s a good chance they remove all of their Sylvan Safekeepers. If they see Chain of Vapor in our hand then they are almost obligated to take it with a discard spell, ultimately protecting our key combo pieces. If they decide to take our combo pieces then they have to wait until they find more discard for Chain of Vapor. Like versus other combo decks Empty the Warrens is pretty bad because we can make 40 goblins and they can just untap and kill us. If there is a scenario where Empty the Warrens is good we still can always Burning Wish for it. Tendrils of Agony comes in because most lists have Surgical Extraction in the sideboard. While it’s not very good against us there’s still a lot of players who bring it in, so we best try to plan for it.